Divider Designer - Grid

About
Divider Designer Grid is an indirect 3D modeling tool tailored specifically for laser cutters. Customization is facilitated through an intuitive menu with customizable parameters.
Features:
- IN and MM unit versions available.
- Two sizing methods
- TRAY - User inputs the width, depth, height of the divider tray by using either ‘inside’ or ‘outside’ measurement reference.
- CELL - User inputs the width depth, height of the cell. All cells in the grid array will be the same size.
- Customizable array of rows and cols.
- Separate material thickness options for the Tray and Dividers.
- Create either tab/slot or ‘free-floating’ divider system.
- Many vertical and horizontal slot/tab configurations.
While Divider Designer Grid is primarily designed for laser cutters/engravers, the exported SVG (2D) and STL (3D) files are versatile and can be adapted for CNC tools and 3D printers as well.
The Divider Designer Grid script operates within the powerful JSCAD environment—an open-source project that enables parametric 3D modeling through code. Check it out here: JSCAD.

Menu Parameters
COMMON
COMMON group menu parameters
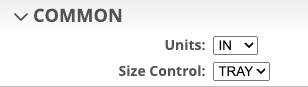
Units

units of measure are in either in inches or mm millimeters.
While you can switch between inches and millimeters during design, the generator doesn’t automatically convert the input values to the new unit, so adjustments must be made manually. Cutgen offers separate design generator options for both ‘IN’ and ‘MM’ measurements, each with pre-set default values. For an optimal experience, we recommend choosing a single measurement unit and avoiding switching between them.
Size Control
Size Control options are TRAY or CELL.
TRAY - User sets the tray width, depth, and height using the TRAY menu option parameters.
CELL - User sets the width, depth, and height of the cells within the grid array. All cells within the grid array will be the same size.
TRAY

The tray is a box used to contain the grid divider assembly. Dividers can be notched or non-notched (free floating).
When Size Control method is set to TRAY, user can set the width, depth, and height of the tray assembly. Either inside or outside measurement reference.
Meas Ref
Box size will either be Outside or Inside reference. This is useful when you need to place one box inside of another.


Tray Sizing Parameters
thickness
Thickness of the material being used.
laser kerf
User will need to determine the correct kerf value for their laser and material. There are plenty of internet resources and tutorial to help with this set-up.
width
Width of the tray, based on Inside or Outside measurement reference. See Meas Ref
depth
Depth of the tray, based on Inside or Outside measurement reference. See Meas Ref
height
Height of the tray, based on Inside or Outside measurement reference. See Meas Ref

Joint Parameters
joints per width side(F/B)
Number of fingerjoints along front and back sides.
joints per depth side(L/R)
Number of fingerjoints along the left and right sides.
joints per height side(ALL)
Number of fingerjoints along the height (z) axis.
Show Hide Params
show front side
Checkbox to show/hide front side.
show back side
Checkbox to show/hide back side.
show left side
Checkbox to show/hide left side.
show right side
Checkbox to show/hide right side.
3D Layout Separation
Separation distance of 3D tray sides.
DIVIDERS
thickness
Thickness of material used for dividers.
laser kerf
User will need to determine the correct kerf value for their laser and material. There are plenty of internet resources and tutorial to help with this set-up.
rows
Number of divider rows.
cols
Number of divider cols.

Bottom/Side Tab Divisions
bottom tabs/division
Number of bottom table per each divider segment or division.
side tabs/division
Number of side tabs per each divider segment or division.

bottom tabs
Checkbox, if checked, include bottom tabs.
side tabs
Checkbox, if checked, include side tabs.
3D Layout Separation
Distance of separation between divider components.
CELLS
When Size Control method is set to CELL, user can set the width, depth, and height of each cell in the grid array. All cells within the grid array will be the same size.
VIEW/EXPORT
View
Options are 3D or 2D
show divider 2D
In 2D view, check/uncheck to show/hide the divider assembly.
show box 2D
In 2D view, check/uncheck to show/hide the tray assembly.

Divider Cell and Tray Size Values
The divider cell size (width/depth/height) and inside/outside Tray dimensions can be viewed by opening the browser debug console inside the ‘developer tools’. This procedure will vary from browser to browser.
These dimensions may be important depending on what you are trying to achieve. For example, if you have a pre-existing box and want to make a tray/divider assembly that fits inside that box, then you would want to design the Tray using the ‘outside’ measure reference. Make the outside dimensions of the tray slightly smaller than the inside of the box you are inserting the tray into.

Chrome and Edge browsers
- Click on main menu
- Click on ‘More Tools’
- Click on ‘Developer Tools’
- Click on ‘Console’ tab.
- divider cells dims w/d/h will be displayed in console output.
Firefox browser
- Click on main menu
- Click on ‘More Tools’
- Click on ‘Web Developer Tools’
- Click on ‘Console’ tab.
- divider cells dims w/d/h will be displayed in console output.
Safari browser
- Click on main menu ‘Develop’
- Click on ‘Show JavaScript console’
- divider cells dims w/d/h will be displayed in console output.
Shortcut ‘View’ keys
To enhance viewing and navigation of 3D and 2D objects, six shortcut keys are available.

3D
2D

Mouse Navigation
Pan (Move)
To pan or move a 2D or 3D model on the screen, press and hold the ‘SHIFT’ key, while at the same time hold down any mouse button (left, right, or scroll wheel). Drag the mouse to move the model around the 2D/3D space.
Orbit (rotate)
To rotate a 2D or 3D model on the screen, press and HOLD down any of the mouse buttons while dragging/moving the mouse.
Zoom
To zoom in or out within the 2D or 3D space, scroll the mouse wheel forward or backward.

Procedures
Export to SVG file
SVG is a native format for laser and CNC cutting machines. To export your 3D box to an SVG file, follow these steps:
- Under the VIEW/EXPORT menu group, select 2D from the ‘View’ dropdown.
- Press the ‘t’ key to display a top down view of the 2D layout.
- Select ‘SVG’ from the file type select dropdown box.
- Press the ‘Export’ button.
- Output SVG will be save in the ‘Downloads’ folder.

Export to STL file
STL is a native format for 3D printing machines. To export your 3D box to an STL file, follow these steps:
Under the VIEW/EXPORT menu group, select 3D from the ‘View’ dropdown.
Select ‘STL (ascii)’ or ‘STL (binary)’ from the file type select dropdown box.
Press the ‘Export’ button.
Output STL will be save in the ‘Downloads’ folder.
OBJ File Export for use in Blender
OBJ file format works great within Blender
- Under the VIEW/EXPORT menu group, select 3D from the ‘View’ dropdown.
- Select ‘OBJ’ from the file type select dropdown box.
- Press the ‘Export’ button.
- Output OBJ will be save in the ‘Downloads’ folder.